
Super Simple Homemade Greek-Style Yogurt
This delicious Greek style yogurt is a family favorite in our house; I’m sure it will be a fast favorite in your house too! With a family of 7, I love recipes that are quick to throw together and serve my family for the whole week.
So, you are interested in making your own homemade Greek style yogurt in your Instant Pot. Maybe your motivation is the same as mine was. The cost of what my husband calls “the good yogurt” just kept going up. I was spending almost $10.00 per week on yogurt. Yogurt of all things! In an attempt to save a few bucks, I started buying the cheaper stuff. The yogurt that is a little thin and runny with the overwhelming punch in the mouth of aspartame.

I knew my Instant Pot had that little yogurt button, so I decided to start researching how to make it. I just knew it was going to be a major pain in the neck. Except, it wasn’t. It actually looked super simple. If I can make this, you totally can.
First things first, I do not have one of the updated super-fancy new Instant Pot models. The model I use for my yogurt is the Instant Pot Duo 7-in-1, 8 quart, electric pressure cooker. I’ve had this model for over 5 years, and it is still going strong.
Setting up your Instant Pot…
Get your Instant Pot plugged in and ready to go. Be sure your stainless-steel pot insert which fits into the Instant Pot is very clean. You don’t want anything to ruin your batch of yogurt. Talk about disappointment. Now you are ready to start adding your ingredients.

Adding the milk…
Add 2 bottles of Fairlife ultra-filtered milk.

Adding the starter…
Add 2 Tablespoons of non-fat plain Greek yogurt. Whisk until it is well-blended. You’ll be tempted to add the whole container because you don’t want it to go to waste but resist the urge! By adding the whole container, you will unintentionally create bacteria overload. What does that mean? It means the bacteria will become crowded inside your Instant Pot and not have enough food (the lactose from the milk) which means your yogurt won’t set up properly. Too much yogurt starter can also create more of a sour taste instead of the nice tang you want from your yogurt.

Adding the sweetener…
Next, add in the can of sweetened condensed milk and whisk until everything is combined. Now, if you are watching your sugar intake and don’t want any sweeteners, you can totally skip this part. My youngest child loves to eat his yogurt plain or maybe with a little “granilla” – that’s granola for those who don’t have to speak 4-year-old very often. So, I mostly add the sweetener for him.

Incubation time…
At this point, you are ready for the Instant Pot to do all the work for you. Attach the lid of your Instant Pot lid – without the sealing ring – and press the yogurt button. On my particular Instant Pot model, it will automatically beep after 8 hours letting you know the yogurt is done. I have heard on some of the newer models you can select how long you want your yogurt to incubate. Nine times out of ten, my yogurt is ready after 8 hours. Occasionally it isn’t quite as thick as I would like, and I let it go a couple of more hours. If I ever need to do this, I just reset the timer and then recheck every 2 hours until the desired thickness is achieved.
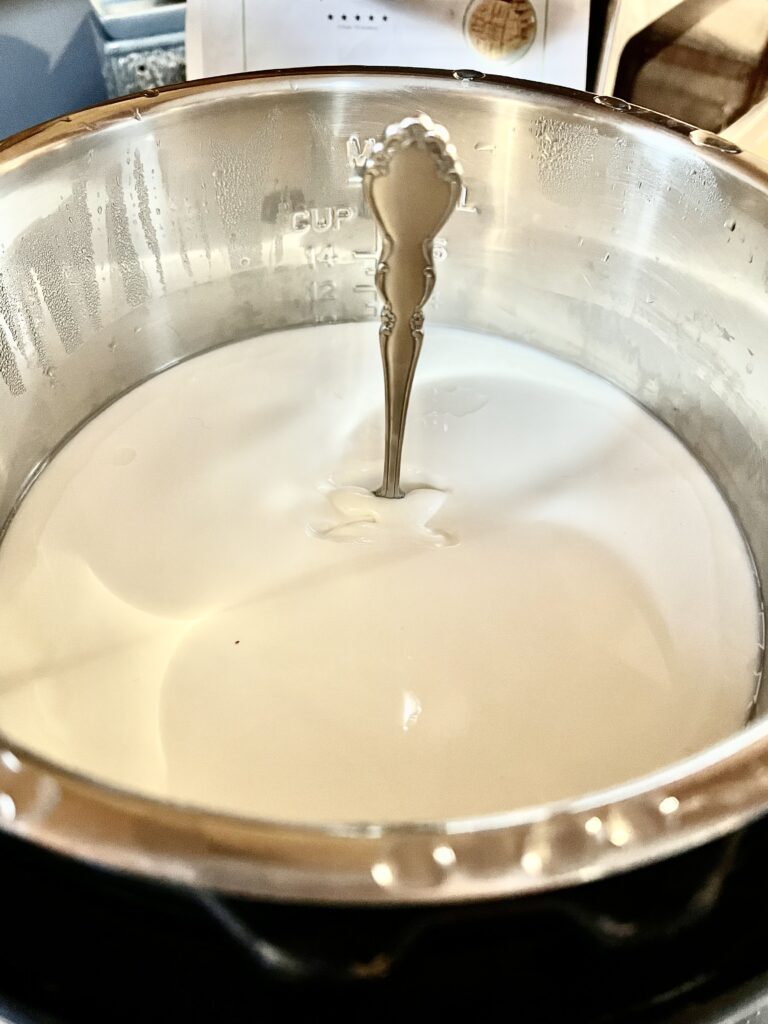
How do you know it is thick enough?
I like to do what I call “the spoon test.” If I can stick a serving spoon in the middle of the pot of yogurt, and it stands straight up without falling over then I know it is ready. My kids think this is the coolest trick ever.
Time to get it ready for the fridge…
Once it passes “the spoon test,” I give it a good stir and then start dividing the yogurt into individual containers. The individual containers work well for our family instead of a large container in the fridge for a couple of reasons:
- It helps with portion control. Sometimes little eyes think they are hungrier than they actually are.
- Each family member can add their own favorite toppings. For example, granola, homemade jam, fresh fruit, frozen blueberries, etc.
- It transports well in lunchboxes.
- The smaller containers take up less space in the fridge.

That’s it! Super simple Greek-style homemade yogurt. Give it a try and let me know what you think down in the comments.

Handy Instant Pot Yogurt Tips
- Since this is a cold-start yogurt, you want to start with an ultra-filtered milk like the Fairlife brand. If you were to make your own yogurt using a traditional method, you would need to bring your milk to a very high temperature before adding in your starter yogurt. With cold-start, you can add all your ingredients at the same time!
- Mix well after adding each ingredient.
- Remove your sealing ring from your Instant Pot lid before starting your yogurt. Your Instant Pot isn’t going under pressure, so it isn’t necessary. Sometimes your sealing ring can hold smells of recipes your have cooked in it before like spaghetti or BBQ chicken. I don’t think anyone wants spaghetti or BBQ flavored yogurt.
- Start your yogurt in the morning just in case you decide you would like it to incubate it a little longer. No one wants to be up checking on their yogurt at 3:00 AM.
- Check your yogurt at the end of 8 hours. If it isn’t as thick as you’d like, reset the timer on the Instant Pot and re-check every 2 hours until desired thickness is achieved.
Super Simple Instant Pot Greek Yogurt

A delicious, thick Greek-style yogurt sure to please the yogurt lovers in your life.
Ingredients
- 2 - 52 oz. bottles of Fairlife Whole Milk
- 2 Tablespoons of Greek non-fat plain yogurt (must contain live cultures)
- 1 - 14 oz. can sweetened condensed milk (optional)
Instructions
1. Add both bottles of Fairlife milk to Instant Pot stainless steel insert.
2. Add 2 tablespoons of Greek nonfat plain yogurt to the milk and whisk until thoroughly blended.
3. Add sweetened condensed milk if desired and whisk thoroughly.
4. Place lid on Instant Pot without sealing ring. Press "yogurt" button.
5. After 8 hours, remove the lid and check to see if yogurt is desired thickness. If not, replace lid and restart yogurt function. Recheck every 2 hours until desired thickness is achieved.
6. Place warm yogurt in a large bowl, mason jars, or individual sized yogurt jars.
7. Store in refrigerator for up to 2 weeks.

I adore this yogurt! I have some every morning with my breakfast.